Posts Tagged ‘recipes’

Liver pate and grain-free almond “bread”

Wednesday, May 11th, 2011

Although I have been doing most components of the GAPS diet for almost 4 months, I had not been eating organ meats until recently. When Dr. Celena Hadlock asked about my organ meat consumption in a phone conversation as one of her first questions and when I saw that Monica Corrado has begun teaching classes locally on liver, I knew I just needed to get on board in order to fully heal my gut and regain my strength and overall health.

So I ordered chicken livers from my farmer for delivery the following week, defrosted them, and just last night made my first batch of liver pate. It is quite good!

Thanks to Kimberly Hartke’s recipe at Hartke is Online! I forgot the fresh parsley even though I have it growing on the deck! But it’s great anyway.

I just sauteed onions in lard from my farmer, put them in the Vitamix and then cooked the liver on both sides for a few minutes with salt, pepper, sage, rosemary, thyme, basil, oregano and garlic. I mixed it all up (okay, I added a little olive oil) and, voila!

Chicken liver pate with almond flour "bread"

I’ve been eating the pate with the grain-free bread in the Gut and Psychology Syndrome Diet. The recipe is more or less three simple ingredients:

2 cups almond flour

1/4 cup coconut oil or another healthy fat

2-3 eggs (depending on size and whether or not whites are used)

Ideally, you would soak your own almonds overnight in sea salt and then dehydrate them for optimum digestability. This time I just used Bob’s Red Mill almond flour.

I don’t use much of the egg white since I’m sensitive to it, so my bread looks extra yellow. I also add at least 1/2 tsp sea salt.

Then, if I want to make a savory bread, I add pressed garlic, a little more salt, rosemary, basil and oregano.

If I want more of a “dessert” type “sweet” bread, I add cinnamon, nutmeg, clove and vanilla and almond flavorings (alcohol-free from Frontier). I’ve also done a variation with carrot and apple for a “carrot cake.”

The thicker I made the “bread,” the longer it needs to bake or the quicker it should be eaten (within a day or two). If I cook it very thin (usually just in a baking dish well greased with coconut oil), then it’s more like the cracker here. The coconut nut oil gets frothy as this bread bakes, but it settles back down upon cooling.

I’ve been doing 325 degrees in a convention oven for about 25 minutes. It’s important to just eyeball and stick a fork in to see if it’s ready before you expected it to be!

Read more great posts about Real Food at Kelly the Kitchen Kop’s Real Food Wednesdays!

Share

Gluten-free, dairy-free black bean brownies

Wednesday, December 15th, 2010

On December 13, President Obama signed the Healthy, Hunger-Free Kids Act of 2010 to “improve” the school lunch program. Some “Real Food” enthusiasts raise questions about the fact that the school lunch program is even tied to the Agriculture Department, a point Sally Fallon made in her address, “The Politics of School Lunch” at the 2010 Weston A Price Foundation’s Wise Traditions conference, which I had to miss (but am hoping to listen to soon. Read some highlights here and here.)

I know there is plenty to critique with regard to the USDA’s dietary guidelines and to school lunches, some of which I wrote about after participating in a conference call last February with Secretary Vilsack. The USDA is big on whole grains and low-fat dairy and isn’t exactly concerned about proper preparation of beans and grains or about nutrient-dense food from sustainable farms.  But when I heard Secretary Vilsack mention on NPR that he’d been to a school that was serving “high-protein” black bean brownies, a lightbulb went off.

I had  just soaked and cooked a bunch of black beans, per instructions on the beautiful bean and grain chart Monica Corrado is now selling at Simply Being Well (the chart is based on Nourishing Traditions). There were more beans than I needed for dinner, and I  had friends coming over, so I figured I’d try putting them to sweet use.

Last year, for my Holistic Moms chapter anniversary party, my friend Sarah used this recipe for Black Bean Brownies (from Whole Foods Market). The treats received rave reviews from everyone (well, except from Petula Dvorak in her Washington Post article about the evening). I’ve been wanting to try making them since, and now was the time.

I adapted  the WFM recipe (took a few hints from recipes at Living Without magazine, Foodie Reflections blog and GoDairyFree.com) to try one batch of brownies with carob and one with cacao from Wilderness Family Naturals (and both batches with properly soaked nuts).  They were both delicious in my book. Even my husband, usually a reluctant carob eater, raved about them. Then he tried the chocolate version and said, “Wow, and I thought the carob was good!”

I reduced the sugar in these recipes quite a bit and added some Grade B maple syrup plus a little coconut milk, and I used coconut oil instead of butter since I am dairy-free.

Enjoy! And tell the head of food services at your school how much better off the kids will be if the school buys dry beans and soaks them instead of using canned!

Gluten-Free, Dairy-Free Flourless Black Bean Brownies

1.5 cups of black beans that have been soaked in whey, vinegar or lemon juice for 18-24 hrs. and then cooked 1-1.5 hrs, then drained. Note: most recipes call for a 15-oz. can of beans. This is closer to 12 oz.

1/3 cup coconut oil (melted)

2 (pastured) eggs

1/3 cup sugar – Rapadura, Sucanat, date sugar, or maple sugar

1/4 cup Grade B Maple Syrup

1/4 cup coconut milk (not low-fat)

1.5 teaspoons GF vanilla

1/8 teaspoon sea salt

1/3 cup cacao/cocoa powder or carob

1/2 cup walnuts or another nut (or 1/2 cup shreeded raw coconut, or 1/4 of each)

optional: additional chocolate chips

Combine all ingredients and mix with a mixer or in a blender or food processor. Pour into an 8×8″ (or close) baking dish greased with coconut oil. (I used a Pyrex pie dish and got a nice round of shallow brownies). Bake in a preheated oven at 350 degrees for 25-40 minutes. Remove when a fork comes out clean and the top looks set.

Please check out many other posts on Real Food at Kelly the Kitchen Kop’s Real Food Wednesdsay’s blog carnival.

And if you have a great link to share analyzing the new federal school lunch bill, the Healthy, Hunger-Free Kids Act, from a Real Food perspective, please send it along!

Share

Gluten-free, Dairy-free Pumpkin Quick Bread

Wednesday, December 1st, 2010

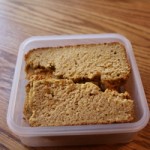
“Gluten-free food at Waldorf school” is something of an oxymoron; those places love their wheat! My son brings his own bread and muffins for snack to replace the homemade, whole wheat organic snacks the students and teachers make in the classroom.

Our GF bread ready to freeze for the next few weeks of school

Last night my husband said to some friends of the boy’s school and his diet, “E has his own bread,” which I revised as “We make bread for him and bring it.” This is no small feat as I am not a big baker, but I’m happy to say that only once this year did I have to resort to sending a piece of packaged millet bread.

Since E and I have both tested as sensitive to yeast and should probably also avoid it to quell Candida, I prefer to make simple quick breads. They are, also, quicker!

After much trial and error with various ingredients and attempts to remove sugar, here is the recipe I have adapted from Monica Corrado of Simply Being Well, who, in her GF cooking classes has referenced Analise Roberts’ Gluten-Free Baking Classics. The big change I’ve made (in addition to not caring how the loaf looks) is taking out most of the sugar and using maple syrup and coconut milk instead.

GF pumpkin quick bread

This bread isn’t going to hold together for sandwiches and it’s not going to rise to great heights, but it’s delicious.

At this time of year, I’ve been making this bread with pumpkin, but you could substitute more applesauce, or butternut squash, or just some well blended/mushy zucchini and carrot. It’s no secret that I am pretty much a trial-and-error kind of gal; you’ll never catch me telling you my measurements are exact and must be followed strictly. Let’s hope you’re willing to eat something that might not look award-winning but tastes great.

GFCF Pumpkin Quick Bread

2 1/4 cups GF flour mix

I used 1 3/4 cup almond flour for extra flavor, moisture and protein with 1/4 cup sorghum flour and 1/4 cup millet flour

2 teaspoons baking powder

1 teaspoon baking soda

1 teaspoon xanthan gum

1 teaspoon sea salt

1 teaspoon maple or date sugar (or Rapadura or Sucanat)

Optional flavoring: 1/2 tsp cinnamon or small amounts of nutmeg, cloves and ginger if you’re looking for more of a sweet treat that reminds you of pumpkin pie. Those spices also work for a “morning glory” bread concept with zucchini and carrot. If you are using butternut squash and looking for more of a savory bread, you could try a little more salt or Herbamare with some basil, oregano, rosemary and/or thyme.

1 cup liquid mix – coconut milk, maple syrup or molasses, applesauce and/or pumpkin

The ratios depend on how sweet you want the bread vs. how full of a veggie/fruit. I used almost 3/4 cup pumpkin (baked and blended until smooth) and the rest (full fat) coconut milk and applesauce with maybe a Tablespoon of maple syrup and a smidge of molasses. Pumpkin is creamier/thicker, and applesauce and some other veggies might be more watery.

2 (pastured) eggs, beaten

1/4 cup melted coconut oil

Optional: 1 teaspoon vanilla and/or almond flavor or another flavor

Mix all the dry ingredients and set aside.

Mix all the wet ingredients. Be sure that the eggs and the other ingredients are warmed to room temperature first so that they mix with the warmed coconut oil instead of turning it solid. But also make sure the coconut oil is just melted and not so hot that it will start to cook the eggs when they come together!

Mix wet and dry together and spoon into a bread pan (lined with parchment paper if you want to avoid Teflon) and smooth out on top (more than I did in the photo above!)

Bake in an oven preheated to 350 degrees for 25-40 minutes. Check at 20 minutes to see how clean your fork comes out.

GF mini-muffins with added nuts and raisins

Last time I used most of the batter for bread and then added to the rest of batch: raisins, chopped crispy pecans (soaked and dehydrated at 105 degrees), vanilla and a little extra maple syrup and made into mini-muffins that took just about 8-10 minutes to bake.

For the photos here, I’d upped the xanthan gum to 1 tsp as listed above, and my husband noted how spongy the dough was. Although the bread did crumble, it was a soft, moist crumble rather than a gritty, dry crumble. The muffins held together well.

Everything was delicious!

Share

Homemade Chicken Stock

Tuesday, February 9th, 2010

One of the easiest things to do to stay – or get – healthy in the winter is to make your own chicken stock, or bone broth. Some people like to claim that healthy eating costs a lot of money, but broth is something you can make from the bones of a chicken you already ate, plus some apple cider vinegar and veggies (see recipe below).

The result is a protein-rich and mineral-rich healing liquid that can be drunk on its own as a tonic for upset tummies, as a base for soups, or as an addition to a stir-fry or any kind of cooking of veggies. If you make your own baby food, use stock instead of water to add fat, which will help your child absorb any vitamins & minerals in the veggies (and the stock adds nutrients and protein of its own).

Our house is gluten-free by necessity, but I also avoid processed rice pasta most of the time preferring to cook whole grains like brown rice and millet in broth. It’s so much tastier and healthful. And, often, cheaper!

I recently attended another great cooking class with whole food chef and holistic health educator Monica Corrado of Simply Being Well. If you’ve never made stock before, watching it done in person might be a good motivator to get on the homemade bandwagon. It’s instructive to see the process done in person, and learning in a community is fun and rewarding.

But if you’ve got a carcass just about picked clean and you’re ready to go, here is the simple recipe to get you started.

It’s best to have two chicken carcasses or one carcass and a bunch of wing bones (or other bones if you can get them from your farmer or butcher). If you have only one carcass, you might cut the recipe in half to avoid a weak broth. It’s fine to store one carcass in the freezer until you have a second ready.

Starting ingredients:

  • 4 quarts (filtered) water
  • 2 Tablespoons raw, unpasteurized apple cider vinegar (or another kind of vinegar if necessary, the milder the better. Try rice vinegar before grain vinegar. I don’t think balsamic works for this purpose).
  • Chicken* bones (two carcasses if available)

* Use good quality chickens that have been bred on pasture. Organic or “pastured” from a farmer you trust is best. Be sure at a minimum that they are hormone & antibiotic-free. Organic chickens at the store might be pricey, but you can get them directly from farmers at markets or through co-ops for $3.00/lb.

Step 1:

Mix the above in a stock pot.

Step 2:

Let sit for 30-60 minutes at room temperature.

During this time, the vinegar is pulling out the calcium and other minerals from the bones. It might help if you’ve cut up or snapped some of the bones.

Step 3:

While the water/vinegar/bones sit, cut up one onion, three celery stalks and two carrots. Big pieces are fine.

Note: celery and carrots are both on the “dirty dozen” list, meaning they are among one of the foods it’s most important to eat organic.

Step 4:

Add the veggies to the pot and put on heat to a boil.

Step 5:

When the pot starts to boil, try to skim off anything that looks like scum – tiny particles and bubbles that are impurities. If you don’t do this, life will go on, but you’ll notice that your final product will look not so pure.

Step 6:

After skimming, lower the temp of the pot to a low simmer. The top of the stock-in-progress should be relatively still while there is rolling going on under the surface. Cover for the remainder of the cooking.

Step 7 (aka “Wait”)

Let this roll (covered) as long as possible – no fewer than 6 hours. The closer you can get to 24 hours, the better. The flavor will be rich, and it will be a wonderful healing food full of gelatin. You can turn it off if you go to work or to bed and leave it on the stove to bring back to a boil hours later. Skim the scum each time you bring it back up to a boil, and then turn the heat back down each time.

Step 8:

When you’re ready to call it quits, put a bunch of parsley in for last 10 minutes for an extra wallop of minerals (and flavor).

Step 9:

Now you’re ready to strain the stock into a big bowl (using a mesh strainer and going slowly so your bones and veggies don’t fall in).

Any remaining meat and the veggies have all been stripped of their nutritional value by now. Toss them out or feed the meat to the cat.

If you did a short run of this stock, you might save the bones for a second use.

Step 10:

Let the stock cool some before you ladle it into jars for storage. Whether you cool it in a bowl or in smaller containers, it’s nice to let the stock completely cool in the fridge before you use it so you can take off the top layer of fat if you wish and so that you can see how solidly the stock “set up” – how gelled it got.

Don’t put warm stock in the fridge; it will just warm up your fridge! Let it sit out and get to room temperature first.

Future use:

If you don’t plan to use the stock right away, you can store in Mason jars (be sure to leave at least an inch at the top so they don’t burst in the freezer) or freeze in cube trays for small uses here and there. Stock keeps in the fridge for a few days; use your nose, but I’d feel very comfortable with 3-4 days, and some folks would go up to a week. Bringing to a boil again is a good idea.

Enjoy this wonderful, delicious healing food that is far superior to anything you could get in a box or can!


For more on this and other traditional foods, see Sally Fallon’s Nourishing Traditions and the Weston A. Price Foundation.

Share

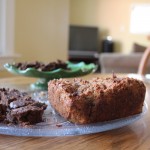
Applesauce Cake – Gluten-Free, Dairy-Free, Low-Sugar

Monday, January 4th, 2010

At my son’s Waldorf school, birthdays are celebrated with applesauce cake. We always pack my son a wheat-free, gluten-free alternative for the baked goods. I also make them dairy-free so that I can eat them and because we try to keep my son’s dairy intake down.

I was very pleased with the cake we made yesterday after I’d cobbled together several different gluten-free recipes. I substituted almond flour for most of the flour and drastically reduced the sugar (though did not omit for fear of a too-soggy cake).

Next time I will make a double batch so that we can have plenty to munch on at home! This time we had to reserve three servings for two birthdays this week (and one we’ll freeze for next week). I will also increase the spices from the numbers used here, but I’ll leave them for those who prefer a milder taste.

GFCF Applesauce Cake Recipe

Dry ingredients

  • 1 1/2 cups almond flour
  • 1/2 cup potato starch flour
  • 1/2 cup brown rice flour (Could use other GF flours per your preference, but the almond makes it moist and sweet and gives the cake more protein)
  • 1 1/4 tsp baking soda
  • 3/4 tsp baking powder
  • 1 tsp xanthan gum
  • 1 tsp (real with minerals) sea salt
  • 1 tsp cinnamon
  • 1/2 tsp ground cloves
  • 1/4 tsp nutmeg
  • shake of ground ginger

(increase all spices if you want more flavor)

Mix the above in one bowl and set aside.

Then mix the following in another bowl:

  • 2 (pastured or at least organic!) eggs, beaten (and warmed so the coconut oil will not harden)
  • 1/3 cup warmed (to liquid) coconut oil
  • 1/4 cup Sucanat, Rapadura, date sugar, or maple sugar

Add to that mixture

  • 1 cup applesauce (organic or local from an orchard you trust)
  • 1/4 cup coconut milk mixed with water (so not too thick)
  • 1/2 cup grade B maple syrup
  • 1/4 tsp black strap molasses (could add more)
  • 1 tsp vanilla (try for GF/alcohol-free. Could increase quantity if desired)

Mix the wet ingredients into the dry bowl. Mix well, with electric mixture for a short time if necessary.

Optional to add in nuts or raisins. If adding raisins, cut down on the sugar and/or maple syrup.

Grease pan(s) with coconut oil prior to filling them or use parchment paper to line if you don’t want your food touching non-stick/Teflon surfaces.

Bake at 350 degrees for 40-50 minutes. This should fill one 13×9″ pan.

(I used a square pan and put the additional batter in a pumpkin-shaped pan, per my son’s request. That one cooked in 25-30 minutes as it was not as thick.)

Enjoy!

Share

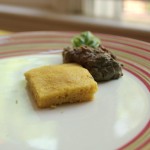
Gluten-free, dairy-free pumpkin pie!

Friday, November 27th, 2009


I finally took a photo of a gluten-free, dairy-free pumpkin pie this year! Two different times!

The crust was largely hazelnut and rice flour with all the spices of pumpkin pie. I used coconut oil and put a little vanilla in with the cold water, using this crust recipe (with mostly nut flour/meal). I baked the shell for 15-20 minutes before filling it with the pumpkin mix.

I used essentially the spices in the proportions on the can of pumpkin (there were no pie pumpkins available this week) with just a little extra of each spice. For one pie, Libby’s calls for

  • 1 teaspoon ground cinnamon
  • 1/2 teaspoon salt
  • 1/2 teaspoon ground ginger
  • 1/4 teaspoon ground cloves
  • 1/4 nutmeg (that’s my addition)

  • The liquid filling for my one pie omitted the “3/4 cup granulated sugar” and instead included:

    • 2 pastured eggs from the farm
    • about 1 1/2-2 cups of coconut milk (full fat, unsweetened, organic – see brand discussion below)
    • a half cup of maple syrup
    • a dollop of molasses
    • less than a teaspoon of Sucanat (actually this was probably in with the dry spices)
    • about a teaspoon of vanilla.

    I put just a little arrrowroot in a tiny bit of water and mixed that with the coconut milk (and syrup) just to add a little stiffness. I think that was about right.

    Another time I used pumpkin, which we roasted and then scooped out, but I added too much starch. That time, I included arrowroot and a few Tablespoons of rice flour in the mix, and the result was too solid, as you can see — more like a quiche instead of velvety.

    The rest of the mainstream directions I followed, after baking my mostly-nut meal crusts for 15 min first:

    Mix dry ingredients in a small bowl. Beat eggs in a larger bowl. Add in pumpkin and spices and mix well. Slowly mix in in coconut milk/maple syrup/vanilla mixture.

    Bake in preheated 425° F oven for 15 minutes. Reduce temperature to 350° F; bake for 40 to 50 minutes or until knife inserted near center comes out clean.

    In all cases, the pies were delicious. People who need more sweet can add ice cream. We used So Delicious Coconut Milk Ice Cream though I am not a fan of that brand’s coconut milk in a carton and always use the canned organic coconut milk that has no weird additives besides a little guar gum and water. And it tastes a lot better than the So Delicious cartons. As for coconut milk brands, Thai Kitchen is a little more expensive where I live than Native Forest, so I usually go with NF. The Whole Foods Brand is cheapest but is often more watery and less flavorful. I found I couldn’t really tolerate the Tropical Traditions Coconut Cream Concentrate very well, and I didn’t like having to warm up and add water.

    Share

    GFCF rolls with hazelnut flour

    Friday, November 27th, 2009


    I wanted to share a photo of the GFCF rolls I made for Thanksgiving this year and an update on the recipe. The bulk of the flour this time was Hazelnut flour from Bob’s Red Mill with some sorghum, rice, and tapioca. Also, I got away with using hardly any sugar and a little more molasses (along with a little more flour) than in my original recipe, which, I believe should be in the new Holistic Moms Network cookbook (I haven’t seen a copy yet).

    Ideally I would soak and dry my own organic nuts (or use nuts from Wilderness Family Naturals) and then grind those for my flour since Bob’s nut flour is not organic. But at least the rolls don’t send anyone’s blood sugar through the roof!

    Share

    Potato Pancakes (gluten-free, dairy-free)

    Tuesday, May 19th, 2009

    This is not the most stellar recipe post, but I thought I’d share that lately I’ve been making a quick side dish out of the extra farm eggs we have now that I’m no longer nursing and eating two each morning (and I keep forgetting to decrease my order size!). My son loves eating these savory pancakes. I essentially beat a couple of eggs and add to them grated potato, zucchini, carrot and chopped onion (maybe some spinach, too) with some herbs, salt and pepper. Then I add some tapioca flour or rice flour and/or arrowroot. It’s very unscientific. I just add until I feel like the mixture will hold together. I think I tried adding in some coconut milk once — maybe I mixed that with the flours first and then added to the egg. At any rate, I fry the mixture in a pan with olive oil or coconut oil and flip at least once. Pretty simple and good.

    Share

    Gluten-Free Rhubarb-Apple-Strawberry Pie (no dairy, low sugar)

    Thursday, May 14th, 2009

    Mother’s Day was also my husband’s birthday. I got my special time running a half-marathon, and then we went out for brunch with friends. He didn’t get much special time, having promised a neighbor we’d babysit for them. D’oh! But he did mention an idea to buy a slice of rhubarb pie for himself, so I got motivated. We also had way too many eggs because I keep forgetting to reduce my farm order to one dozen now that I’m not longer a nursing mom eating for two. So I thought, as long as I’m making crust and heating up the oven, I might as well make some quiche and a pie!

    The results were yummy. I used my no-frills gluten-free pie crust recipe. For the quiche, this time I used sorghum flour, a little millet flour and rice flour with coconut and olive oils plus some oregano, pepper and basil. For the pie, I used almond flour and rice flour, coconut oil and butter plus some cinnamon and nutmeg, and maybe a dash of vanilla.

    I cobbled together a few recipes for the pie with some GF substitutions and came up with this;

    Gluten-Free Rhubarb-Apple-Strawberry Pie (no dairy, low sugar)

    Mixture to coat fruit:
    3 Tablespoons arrowroot and tapioca flours
    1/4 tsp sea salt
    juice of half a lemon
    1/3 cup Sucanat (most recipes called for a cup or more of sugar)
    1/4-1/2 tsp cinnamon
    dash-1/8 tsp nutmeg
    1/4 tsp vanilla (alcohol-free would be better)

    Fruit:
    A bunch of rhubarb cut into 1″ pieces
    Half a pint of strawberries cut up
    One apple cut into chunks — I used half of a gala and half of a granny smith

    Mix all the dry ingredients together & then mix with fruit to set for 15 minutes.
    Before I put mixture into the pie crust, I tossed it with about a Tablespoon or more of coconut milk (not low fat) just for a little creaminess and a little extra sweetness.
    I added a little coconut oil on top too, just because the other recipes said to dot with butter and I thought maybe it could stand some more goo. I did not put a top crust on this even though all the recipes I saw called for it. The pie baked fine.

    Bake time and temp I have to make a best guess as I was also cooking the two quiche and a chicken.
    375-400 worked for me, and I would guess about 45 minutes, though I would check before that and not be surprised if you didn’t like the looks of it until an hour.

    All agreed that it was delicious. My husband got his supplemental sugar with ice cream. I just poured some extra coconut milk on mine. Rice dream or coconut sorbet would work, too. We served it mildly warm and loved it, but it was just as good out of the fridge the next two days.

    Share

    Coconut flour cupcakes

    Wednesday, April 22nd, 2009

    This recipe adaptation comes from Bruce Fife’s Cooking with Coconut Flour

    I’ve reduced the sugar and replaced butter with coconut oil to make a fully dairy-free and gluten-free cupcake.

    These are high protein, high-fiber and rich, even without the butter.

    3 Tablespoons coconut oil (melted)
    3 eggs (warmed in water first so they don’t clump up the coconut oil by resolidifying it)
    2-3 Tablespoons sugar (pref. Sucanat, Rapadura or date or maple sugar, or regular brown sugar)
    2 Tablespoons coconut milk (not low-fat)
    1/4 teaspoon salt
    1/4 teaspoon vanilla (preferably alcohol-free if you are being strict about being gluten-free)
    1/4 cup coconut flour
    1/4 teaspoon baking powder

    Blend the following:
    oil
    eggs
    sugar
    coconut milk
    salt
    vanilla

    Combine coconut flour (first sifted or at least de-lumped) with baking powder. Whisk dry mix into wet and mix until there are no lumps. Pour/spoon into muffin tins.

    Bake at 400 degrees for 8-15 minutes (shorter length for mini-muffins).
    Supposed to make 6 full-sized muffins.

    Variations/Notes:
    -Add in some carob powder to the whole batter for a chocolate-like flavor
    -Add almond flavoring for more of a marzipan taste
    -Don’t add in cinnamon — in my opinion, it just doesn’t really work well with the coconut flavor unless you’re making some more nuanced concept dish.

    -You could easily double the recipe and go up to only 1/2 cup of flour, but then you’re in for a half-dozen eggs! A little coconut flour goes a long way! But it also requires a lot of egg! (No, I’ve never tried this with egg substitute.)

    Share